January 4, 202
John Wiswall reports the rubber in our portholes can be found here:
Wefco Rubber Mfg., Co., Inc.
21000 Osborne Street, Unit 2
Canoga Park, CA 91304
PH: 818-886-8872
FAX: 818-886-8875
www.wefcorubber.com
August 1, 2018
Robert Pomeroy reports:
I recently had the 4 fixed "portlights" re-built. The original gasket was completely oxidized, the glass was spider-webbed and they leaked. I scoured the web looking for someone who could help me. It seems that mostly people simply trash what they have and replace with new.
Finally, I found a shop that helped me: Sonset Marine in Michigan. Sonset advertises that they re-bed hatches, but I thought they might be able to rebuild the portlights as it seems like a similar exercise. I shipped my portlights to them and they returned them beautifully rebuilt. I thought their price was very reasonable.
Thu Jul 6, 2000 4:08 pm
I have found someone who would consider an opening port. I have spoke with
Richard with New Found Metals, Inc. concerning opening ports for Panache, 27X7
5/8. He stated approximately $1,500. for tolling up and approximately $440/50
per port. I mentioned several would probably call concerning opening ports for
an Allied Seawind Mark II.
New Found Metals
Port
360 385-3315 or 1-888-437-5512
Fax: 360 385-6097
Sep 9, 2001 11:41 am
My Seawind was built in 1982 and also has 5 bronze portholes. It seems that some
late models were built as such.
Sep 9, 2001 10:11 pm
Daybreak in
option. That makes three that I know of 130 (post break-up of Allied), 122 and
113.
Sep 10, 2001 11:46 am
I don't know the origin of the picture (website homepage), but can state that
I've seen a number of SW's with 5 ports on the port side.
It may have been a change with a particular serial number.
Date: Mon Sep 10, 2001 11:51 am
My vessel is serial #129, a 1981 model, but the ports which are presently
painted are from a Canadian firm and made of a metal similar to aluminum. Now
the odd thing is the brokers sheet listed them as bronze but they look aluminum.
Any thoughts anyone? I'd sure like to know for sure which they are.
Sep 11, 2001 12:16 am
If memory serves me correctly there were only 129 boats built by Wright/Allied.
Some incomplete hulls were sold at auction as were the molds shortly after the
Allied demise.
Ports that open from the inside and hinge out seem a very strange arrangement
indeed. In my humble opinion this appears to be a boat that may have been
finished by a buyer of one of those few auctioned off. Opening ports almost
always open inboard as far as my memory is served.
Sep 19, 2001 12:35 pm
One of my opening ports on my SW II has a cracked frame. Can anyone give me
recommendations for replacement? Also I am wondering how I can clean up my fixed
aluminum ports and replace the gaskets in them. One another issue is the
replacement of the gaskets for the opening ports on the inside where the lens
frame clamps down. Can you use household weather stripping for this?
Any suggestions would be greatly appreciated.
Sep 19, 2001 4:28 pm
I had the same problem on my Seawind. The opening ports are all plastic and the
sun baked them too much.
So, I replaced all of them. The same ports are still available through West
Marine. The size was just a hair off; I had to file some of the openings in the
boat after removing the old ones. The job wasn't too bad; about a full day for
all 4 port replacements.
I think the old ones were glued in; I used silicone and #10 through bolts on the
replacements to be safe.
Sep 20, 2001 12:39 am
First, plan on two dry days
Second, have a helper
Third, remove nuts, then using a quality screwdriver with a wrench to turn it
with, back out the screws. If they don't come out, use a tool that you hammer
which turns a hardened screwdriver bit to get it started. When removing screws
ensure which hole you took them out off and thats
where they will have to go back in. They are different lengths. After removing
all screws, washers and nuts, use several flat blade putty knives and a steel
wedge to slowly pry (with breaking) the outer flange off, then do the same with
the inside section. Scrape off all old
plumbers putty off boat and parts, clean with mineral spirits. Drill out the
outer flange holes to proper size so bolts will slip in easy. If outside flange
is broken, you can either have it welded or epoxy with fiberglass cloth. Then
purchase new plumbers putty, roll it in your hand forming a long line about 1/4"
diameter and place in corner of port all around and force port into place. Then
have your helper hold it in place, go outside, and roll another piece of
plumbers putty and place on the outside, slip the flange over and hold with
clamp, tighten clamp gently until the port is in place properly. Note: several
clamps may be needed to accomplish this, then force putty into screw holes and
install screws and bolts, you may need to tighten the clamps to get bolts in far
enough for the nuts to go on. If you need further help, advise.
Sep 20, 2001 8:58 am
Don has given you about the best procedure anyone can.
I may only add to this that the frames (aluminum) on my boat have been filled
and faired with an aluminum epoxy compound, then powder coated with nearly the
same color as original. I have replaced the lenses with 1/4 inch, tinted Lexan
The original seals, as far as I was able to discern in the past two years, are
not available any longer. However, I was able to get something close from Ocean
Dynamics in
number I have used for my modification. The seal is shaped to surround the edge
of the Plexiglas lens rather than to jam between the outer land of the frame and
the lens.
Sep 20, 2001 3:22 pm
Bomar makes a very nice but very expensive aluminum port ($400 each) that fit my
boat (K-32) and was easy to install. I went to that after trying a less costly
plastic port and hating its appearance. Bomar made the ports on demand which
meant a slow delivery (perhaps four weeks). I seem to remember that I got a
lower price by ordering through West Marine (rather than direct from Bomar).
There may be other good, lower cost solutions also.
Oct 9, 2001 3:26 pm
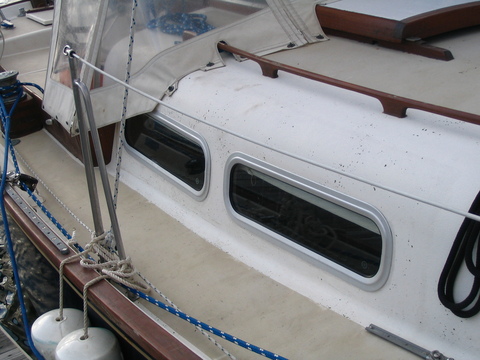
This weekend proved to be another learning experience that I thought I would
share.
Early on in the refit process we removed the fixed port from the main salon. The
original plywood fascia panels on the cabin sides were consigned to the dumpster
also in favor of displaying the original cabin liner as it seemed to add a bit
more dimension and allowed the installation of the full-length grasp rails to
accent the shear line so much better.
The idea proved to be attractive but filling the many and various screw holes
with something akin to the original color proved to be impossible.
My answer was to create a full-sized veneer of white, Fiberglass Reinforced
Plastic to mask the pocks for each side. The original aft cabin bulkhead had
been originally hole-sawn to accept four large, analogue instruments and the
same material is now masking these holes both inside and from the exterior. This
lightly pebble-grained material is often used in restaurants for wall covering
in kitchens and bathrooms. Its flexible, durable, inexpensive, sold in 3 X 6
panels and very washable.
In any case we went about trying to fit the aluminum frames back into the same
openings and discovered that the length of the many attaching screws limited the
amount of space between the actual lens mounting frame for the exterior and the
interior trim frame. The original thought was to simply shorten the machine
screws and remount the ports. Further investigation revealed that the inner
liner and cabin top are not joined do not maintain a uniform distance from each
other and thus forms a very wide drain for water to run through until it finds
its way to the final lip of the liner, found just above the locker and outboard.
The faint traces of salt still adhering to this lip led me to discover that
dependent upon the attitude of the boat this drainage sought all sorts of
inconvenient places to run along before finding its way to the cabin sole or the
bilge.
To solve this problem we have inserted small wooden wedges into the gap, around
the perimeter of each opening, to provide a uniform, combined, dimension of the
outer cabin top surface to the inner, veneered surface of just more than 1/2".
Into this gap we will paddle in a thickened layer of epoxy. The wedges, once
removed will create the new spaces as the layers will be held apart by the
first, cured epoxy mix and these too will then be filled. With a new and uniform
thickness of the liner and the cabin top molds the ports will be re-installed
with adequate bedding and new seals.
*** I have not been able to find seals that are exactly the same as the
originals but managed to secure a roll of very adequate weather-strip from Ocean
Dynamics http://www.oceandynamics.com/
I sent a small sample of the original to them and they sent me back about eight
different style samples to try out.
Dec 28, 2001
I am not aware that any Seawinds had factory Bronze ports unless this was a
special order. I replaced my original plastic ports, which leaked, with Bronze
ones from Spartan 15 years ago or so. I don't know if Spartan is still in
business, they were an offshoot
of
Dec 30, 2001
Bronze ports. Evidently the later SWII's (mine is #122) were offered with them.
They are the same rectangular ports I saw on a Princess recently and I assume
they were put in at the factory.
Jan 8, 2002
The gasket for my port aft window hangs down form the top. Does it need adhesive
or do the screws need to be tightened? What would a person replace them with?
Jan 8, 2002
Before going offshore, I had to address a couple of leaky windows, and all
gaskets showed light surface UV cracking. Unable to find replacement gaskets, I
unseated all the windows (inside and outside, can take some elbow oil). I
scraped old sealant and reset with the original gaskets outside and Life Caulk
inside (which I prefer to Life Seal when possibly called to unseat in the
future, much easier to unseat). I then smeared the gaskets outside surface with
a clear silicon sealer, which improved the aspects and water shedding, and seems
to arrest surface cracking. It still looks OK after 3 years in the sun,
including one year in the Tropics.
This would be a good test. If you find the bedding dried out, and any of the
other windows has the smallest leak, I would extend the rebedding to these other
windows and, if time, all fours. I have had no problem with the smaller
portholes forward of the windows, except with torn bug screens.
I also rebedded the two hatches. Finally, I removed the top aft crossbeam of the
companion hatchway, varnished it to prevent rot, and rebedded it, thereby
stopping for good a stbd side leak (oozing above the Loran and VHF and chart
table in a seaway!) which had defied the preceding owner's efforts for years,
these efforts limited to caulking around the forward beam/roof joints.
�
Feb 23, 2002
This received from the L-33 group;
I'm forwarding a reply that I received from New Found Metals in Port Townsend,
WA to a query about the possibilty of producing opening portlights to replace
our old and aging deadlights in our Luders cabins. Since everyone I've talked
with about changing the crazed plexiglass in our cabins has nightmares to share,
I thought that maybe it might be worth the
money to put in real portlights that also help air the main cabin. In any event,
here are both the reply and my original query. Frankly, I think there are enough
of our boats and Seabreezes out there to create a small demand for 8 x 28
portlights.
Dear Curt,
We do have in mind to make the 8x28. I am not sure yet if we make it in
stainless or Bronze. I am off to my New factory in March and maybe can get a
start on them them, If we do them in bronze the price will be about $495.00
each. Thanks for the tip on the gasket. I will see what I can do
I've got a couple of queries that maybe you can address
from your
connections. First, I know that the cost is probably out of sight, but I'm
trying to replace the large deadlights on the cabin of my old 1969 Luders 33.
They are rectangular and measure 8" x 28" or 6" longer than your longest
portlight. How hard would it be to extend the length of the existing molds and
cast a longer one in ss? Then, the critical question would be how much? If I
decide to do this, I will need four. There are also about 100 of these old
classic boats still out there sailing as well as the other Allied boats like the
Seabreeze that used the same size. All of the portlights on those boats were
cast aluminum as were the rings for the cabin deadlights. All of the existing
boats have 6 portlights. There are also active Luders 33 and Seabreeze
associations so there is probably a small market for replacing the old with new.
Most of these are due for replacement. Let me know a potential cost for the 8 x
28s and I will email the Luders association. I was looking at the Rutgerson
portlights used on the Swedish Najads. They measure 7.5" x 28" and would
probably do, but they are out of sight too. OK, the second querys is this:
Curt Larsen
Jun 11, 2002
Has anyone replaced their opening ports. The old plastic PhyHi ones on Galadriel
are looking pretty ratty so I would like to get new ones, preferably stainless
steel. Any recomendations? The ones from NFM look nice in the pictures, has
anyone actually looked at them in person? How is the quality?
Jun 11, 2002
While I haven't yet purchased the ports from NFM, I did have the opportunity to
examine their product in great detail at the Miami Boat Show. I spoke with their
President and Chief Design Engineer who pointed out quite a list of features his
product has over the competition, such as alloy content, gasket technology,
drain angle and depth, superior dogging mechanism, etc. All this at the best
price when compared to ABI et al. Down the road, after some other upgrades, they
will certainly be my manufacturer of choice.
�
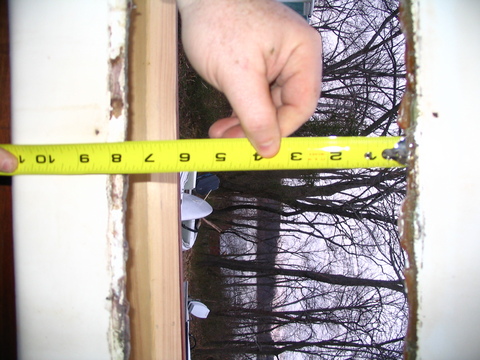
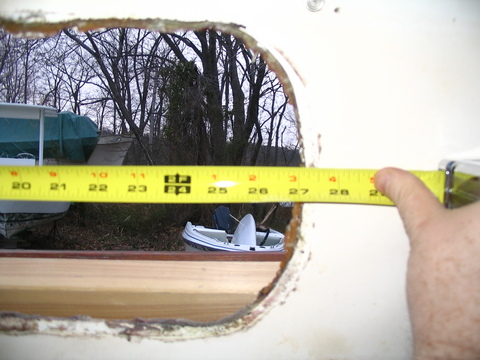
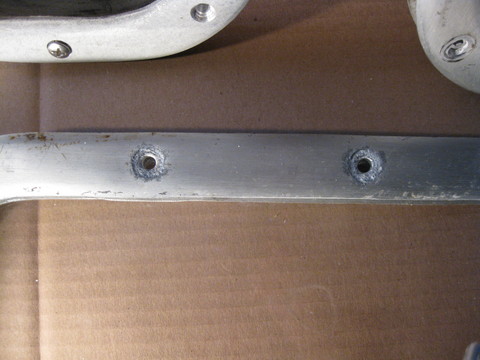
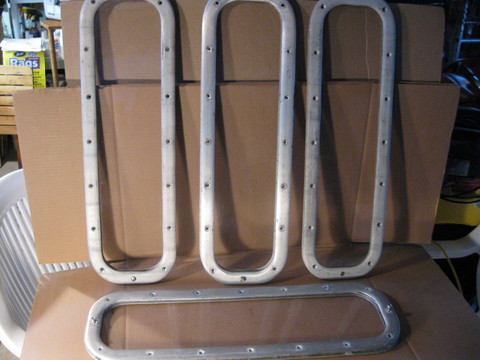
8937� Feb 21, 2009
Hi All,
I replaced my 4 large ports in the main cabin of my Seawind
30 at the end of the summer last year. In order to go sailing while waiting for
the new ports to arrive, I bought new acrylic and re-installed the old portlight frames by drilling through both sides and
through-bolting them. Now that the new ports are in, I have 4 frames available.
Acrylic is like new, some of the fastener holes show some signs of bi-metal
corrosion pitting, but all-in-all they are in good condition. They fit in an
opening 8" x 27.5". Overall outside dimensions of frames are
8.5" x 27.875".
Regards,
Bill Sullivan
8938� Feb 21, 2009
Hi, Bill
Congratulations and good
luck with your new ports!. I'm not planning on any changes right now,but I sure would like to know
all the details of what you put in, who made them, what did they cost,are they fixed or vented,and
most of all what made you change from the originals? I would consider
that job for the future but right now I have too many other things that need
doing. Thanks for any info you can offer; any chance of pictures
?
Bob Burton
Hooligan k 40
8939� Feb 21, 2009
Hi again Bill
I just realized you did post pics,
thanks, Bob B
8942� Feb 22, 2009
Hi Bob,
Sorry for the long post - but replacing my ports was a long process!
I think I had the original acrylic in my ports when I bought Patience in 2007 -
they had a lot of crazing and the ports leaked. Previous owners had applied a
variety of goop to stop leaks and the area around the frames was a mess.
I wanted to keep the boat looking as original as possible, but I couldn't find
frames that presented the same appearance on the outside. I also wanted to keep
the dimensions of the replacements close to original.
The old ports had to come out so I could measure for the new ones. As you know,
the original frames sandwich the cabin walls. Stainless machine screws pass
through the inside frames and screw into the tapped holes in the outside frame,
but do not go all the way through. Stainless fasteners in aluminum = corrosion,
so I had to drill out approximately half of of the
machine screws. My most successful technique was to use PBBlaster,
wait awhile and then attack the machine screw with an impact driver. If that
didn't work after 5 attempts, I'd drill out the screw. It was early March when
I started this, so I had to cover the holes in the cabin walls with plastic.
For the replacement windows, I considered Lewmar
(didn't have frame that matched the dimensions), Motion (good design for a slider,
but I wanted fixed and they seem to use the same frame for both), Diamond (good
windows, lots of options) and Bomon. I chose Bomon because I liked the frame design for their "New
Sail" fixed ports and because
the owner, Willem Boon, is very accessible and takes great care to get the
measurements right. It's not as easy as horizontal and vertical dimensions.
Diagonal measurements, corner radii, wall thickness and camber all come into
play. In addition, Willem has to rely on the customers skill (or lack thereof)
in measuring precisely. It took several tries to get my templates correct. At the
time, the boat was in
the remains of the old fasteners in them, so I drilled holes through the
outside frames to match the inside holes and through-bolted the frames and
windows back in place with a minimum amount of sealant (GE Silpruf)
because I knew I'd be removing these ports and cleaning up the sealant again
soon.
When I finalized the measurements with Bomon, they
had a long manufacturing lead time, so I didn't get the windows until early September.
Installing the new ports is a two person job, so I hired someone to help (Dan
at
ports. I told Willem to make the ports flat and there is actually a slight bend
in the cabin wall as you look down on it from above. The new frames were able
to bend to accomodate the curve, but it put more stress
on the fasteners then I wanted to apply. The ports performed great on the trip
from MD to CT last fall. I had some drips during a driving rainstorm, but I
re-tightened some screws and haven't seen it repeated since.
I paid $288 per port for 4 ports. I thought this was a fair price give the
amount of custom work in them. US-CDN exchange rates and the particulars of
each job affect the price, so I can't say what they would charge now. Well,
that's the story - let me know if you have any questions.
Regards,
Bill Sullivan
8943� Feb 22, 2009
Hi, Bill
Long answers aren't a problem, especially this time of
year.I sympathise; I
replaced my fixed lenses because of scratches,but the P.O. had the frames refinished and the
screws came out easily.(that's when I
started to think about new ports) I think
the price you got was very reasonable. I also bought two boats in
Rock Hall, M.D.,so
I know about "the drive". It's interesting that you mention the curve
in the side wall; I don't recall that,(it was two
years ago,and I didn't have to remove the
frames) but a good point to remember.
I have thought about rebuilding or replacing the two
roof deck hatches, but they don't leak (yet) I would only replace with new if I
could get a very good fit/match. There's a guy in your area who will refinish
&
reglaze for about $ 400/ 450 , which i thought reasonable. I looked on the website for your
photos, but could
not locate them,how
can I access them ?. Thanks for the info and I wish you a lot enjoyment with
your boat.
Bob Burton
Hooligan K 40
L.I.,
N.Y.
8944� Feb 22, 2009
The overhead hatches on the Seawind 11 come from Atkins and Hoyle in
8945� Feb 23, 2009
Hi Bob,
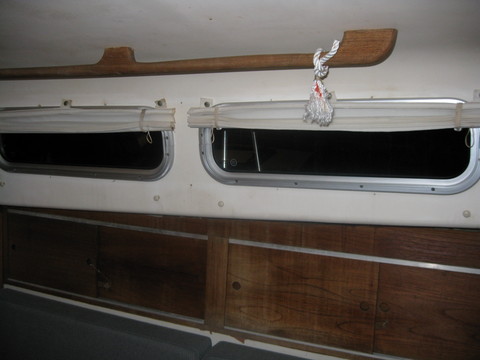
Can't find my photos? I clicked on the Photos link in the left hand navigation
frame on the group webpage and I could see/open my albums. They're on the third
row as it is currently organized - one is titled "Patience - 1968
ASW1" and the other is "Patience � Port Replacement".
I noticed the "LI NY" cruising area in your signature - where do you keep
Hooligan?
Regards,
Bill
8946� Feb 23, 2009
Great pictures, Bill.
A hopefully helpful little tip to others � when I clicked on that Picassa website, it didn�t work. You have to delete the period at the end of what comes up�and it works.
My �72 ASWI doen�t have those forward port holes. I think that would be a very nice feature. �Wonder why they quit?
Patience is beautiful. What is that hull color? Dark blue? Black?
My cabin interior is a woody-looking texture like by your stove and behind your clock. Did you paint the white otherwise�.? I like that look better.
Tad
8948� Feb 23, 2009
Hi Tad,
Thanks for the nice words on the boat and pics - I
claim no photographic skill, strictly a "point and shoot"
photographer. Patience has a dark blue hull and I'd say it's a 100 foot job at
this point (i.e. if you get within 100', you start to see the flaws in the paint).
Regarding the interior, I didn't do the white paint on the bulkheads,
that was the prior owner. I intend to re-finish the interior (white on
the faux wood grain, satin varnish on the wood trim), but I have to get a
handle on leaks from above and below before I do that work.
I like the little round ports too and didn't know that they stopped putting
them in the ASW1 before the end of the run. I want to buy the book that Dan
Smith wrote about the history of the Allied Company. Perhaps that will explain
what happened to them.
Regards,
Bill Sullivan
Patience - 1968 Allied Seawind 30
Carousel - 1971
Old Saybrook, CT